Installing Objective-C SDK for Data Storage and Instant Messaging
Installing SDK
There are several ways for you to install our SDK and the most convenient one is to use a package manager.
Installing with Package Manager
The easiest way to integrate our SDK into your project is to use CocoaPods.
Make sure you already have the latest version of pod on your computer. If not, please check out the INSTALL section on CocoaPods’ website.
Then, run the following command under the root directory of your project to generate the Podfile:
$ pod init
Following the GET STARTED section on CocoaPods’ website, add the following pod dependency into the target of the Podfile:
pod 'LeanCloudObjc' # A module for all the services
LeanCloudObjc contains multiple Subspecs. You can choose to only add the ones you need:
pod 'LeanCloudObjc/Foundation'    # Basic services including Data Storage, SMS, Push Notification, and Cloud Engine
pod 'LeanCloudObjc/Realtime'      # Instant Messaging and LiveQuery
The last step is to run the following command to integrate the latest SDK:
$ pod update
You can also run:
$ pod install --repo-update
After installing the SDK, you can open your project with <PROJECT_NAME>.xcworkspace under the root directory of your project.
Installing Manually
First of all, download the latest source code of the SDK.
Then drag and drop the AVOS/AVOS.xcodeproj project file into the project as a subproject:

Now connect the dependencies by going to xcodeproj > target > general > frameworks and adding the following content:
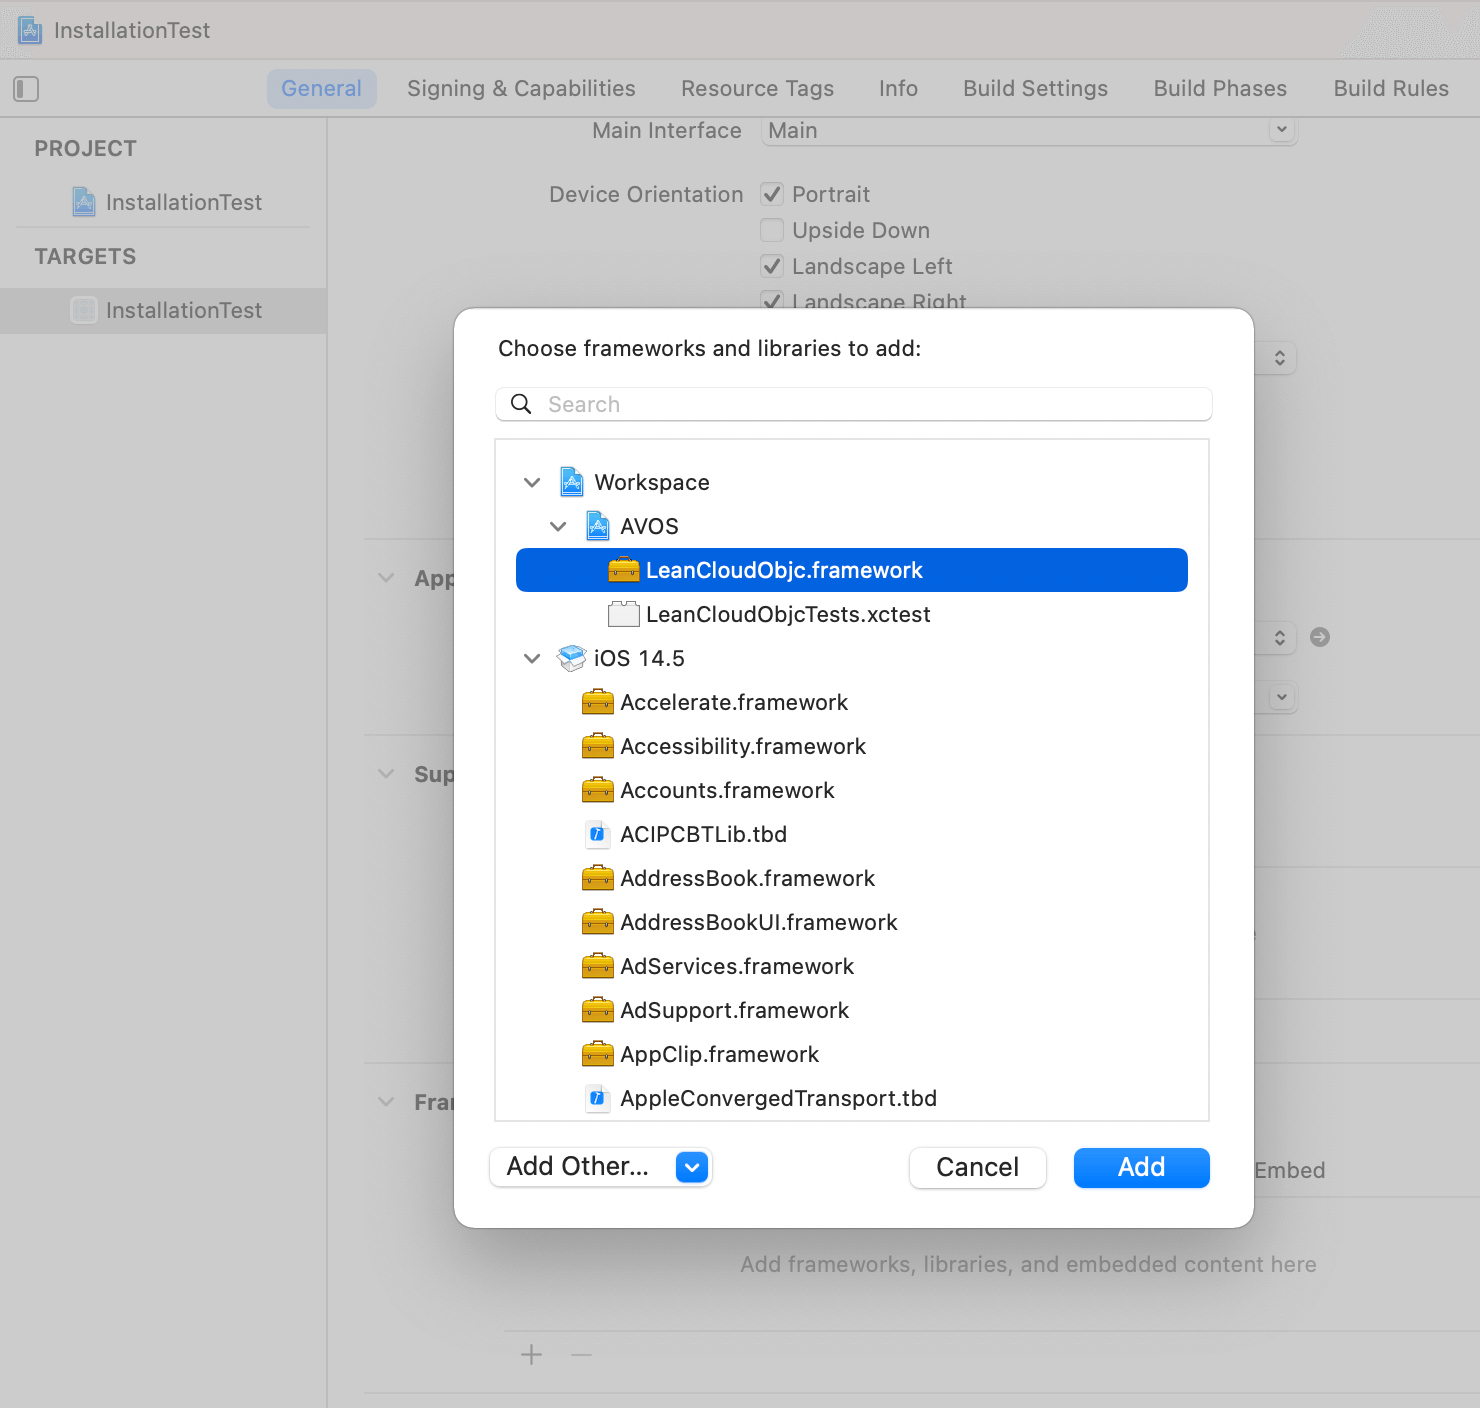
That’s it. You are now ready to use our SDK in your project.
Initializing Your Project
Import the basic modules into AppDelegate:
#import <LeanCloudObjc/Foundation.h>
Then configure the App ID, App Key, and the server URL under the application:didFinishLaunchingWithOptions: method:
[LCApplication setApplicationId:@"your-app-id"
                      clientKey:@"your-app-key"
                serverURLString:@"https://your_server_url"];
Before using the APIs provided by the SDK, make sure you have initialized your application with the App ID, App Key, and server URL.
Credentials
You can view the credentials of your app by going to Dashboard > Settings > App keys:
- App ID will be used when you initialize the SDK.
- App Key will be used when you initialize the SDK on the client side.
- Master Key will be used when you interact with admin interfaces on trusted environments including your own server and LeanEngine. When you use it, all the permission checks will be skipped. Make sure to keep it private and never use it in the code for the client.
See Domain for setting up the domain.
Domain
See Binding Your Domains.
Enabling Debug Logs
You can easily trace the problems in your project by turning debug logs on during the development phase. Once enabled, details of every request made by the SDK along with errors will be output to your IDE, your browser console, or your Cloud Engine instances’ logs.
// Run before initializing the Application
[LCApplication setAllLogsEnabled:true];
Make sure debug logs are turned off before your app is published. Failure to do so may lead to the exposure of sensitive data.
Verifying
First of all, make sure you are able to connect to the server from your computer. You can test it by running the following command:
curl "https://{{host}}/1.1/date"
{{host}} is the custom API domain.
If everything goes well, it will return the current date:
{ "__type": "Date", "iso": "2020-10-12T06:46:56.000Z" }
Now let’s try saving an object to the cloud. Add the following code into the viewDidLoad method or any other method that will be called when the app starts:
LCObject *testObject = [LCObject objectWithClassName:@"TestObject"];
[testObject setObject:@"Hello world!" forKey:@"words"];
[testObject save];
Hit Run to start debugging. This can be done in either a host or a virtual machine.
Then go to Dashboard > Data Storage > Data > TestObject. If you see a row with its words column being Hello world!, it means that you have correctly installed the SDK.
See Debugging if you’re not seeing the content.
Debugging
This guide is written for the latest version of our SDK. If you encounter any errors, please first make sure you have the latest version installed.
401 Unauthorized
If you get a 401 error or see the following content in network logs:
{
  "code": 401,
  "error": "Unauthorized."
}
It means that the App ID or App Key might be incorrect or don’t match. If you have multiple apps, you might have used the App ID of one app with the App Key of another one, which will lead to such an error.
The Client Cannot Access the Internet
Make sure you have granted the required permissions to your mobile app.